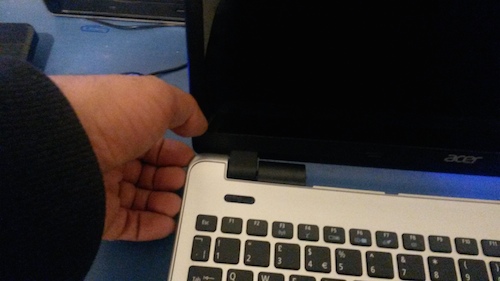
I bought an ACER V5, which from Curry’s/PC World. Here are my notes! …
The battery comes detached. You need to attach and charge it. The battery release is a slider, not needed for inserting the battery and will need a lever if you need to remove it.
I was promised no anti-virus but they lied, it comes with McAfee.
Setup
It installs from WiFi although it needs Internet to install, and I am unsure how to install without opening a Microsoft passport account. This is now, it seems usual, but remains an outrage, why should I have to login to Microsoft’s portal when I want to use my laptop. It seems this is a ‘setup’ requirement, user accounts can be made local.
Extra Apps
I have installed Firefox, AVG and Libre Office.
Recovery Device
I am making a recovery USB, which I was told needs 32 Gb but the display panels state needs only 16 Gb. I was advised that this takes hours, after about 13 I gave up on it, and googled for the error. Why is this, an article called “USB factory default backup fails to create in Windows 8” so hidden? Also since I bought it two days ago, and it seems to have W8.1 is this the right thing? The recovery disk failure is a Windows Bug, it would seem I need to upgrade to W8.1; it comes with W8, so needs to run a Windows Update, should have done this first!
ooOOOoo
I need to reconfigure the User to use a local login.
I need to check if it has updated to W8.1
I liked it so much I got my work to buy one for me.
This came with W8.1 but I still had to make a recovery ‘disk’ which i did on a USB, and this was on a 16GB USB drive.
Installing an SDD
I wanted to install an SSD. I cloned the current HDD using the EaseUS ToDo Backup.
Acer do not recommend this and state it will void the warranty. In order to do this, one has to remove the keyboard. This is not well documented on the web, this comment by VBTech on this page at acer’s community page is about as good as it gets.
- Remove the Battery
- Undo all screws
- The keyboard is clipped to the base and attached by three cables. Ease the keyboard loose, starting from the back corners, manipulating the screen so that it is horizontal with the base helps ease the inner hinge covers loose.
- Ease the keyboard free carefully releasing the three ribbon cables from the base. You are advised to use something soft, like a guitar plectrum, once done, fingers and nails are good enough.
- The disk is in the bottom right hand side of the laptop. It beneath the USB ribbon cable and in a cradle. The cradle is screwed to the base and to the disk.It needs to be slide off the standard bayonet fittings after being disconnected from the base.
- To swap the disk you need to release the screws attaching the disk to the cradle.
- To put it together, reverse the order, insert the disk, reattach the ribbon cables, snap the keyboard into position, screw the base back on to the top.
This was exceedingly hard but has worked. The following links acted as further clues,
- http://www.insidemylaptop.com/disassemble-acer-aspire-5745-laptop/
- http://www.manualslib.com/manual/440339/Acer-Aspire-V5-571p.html
Loosen the Keyboard from the back corners,
I added a featured image in 2023, made from an image at Notebook Check, they rate it as poor.

Deprecated